Olympus E-P1 Review

Over here is my review of the Olympus E-P1, Olympus’ first Micro Four Thirds camera. Head on to the Olympus E-P1 photo gallery as well for full-sized photos.
DPInterface Olympus E-P1 PEN Review
Brad Soo – August 3rd, 2009 (Updated August 4th, 2009)
During the film era, Olympus created a line of interchangeable lens, film cameras that were compact; smaller than the average film SLR – the Pen-F camera. Olympus is celebrating 50 years of the ‘PEN’ camera this year with the new E-P1 digital PEN, which also happens to be their first Micro First Thirds camera. Here’s a rundown of the E-P1’s features:
- 12 effective megapixels
- Super Sonic Wave Filter (SSWF) dust reduction system
- 3 inch LCD for live view
- 3 frames per second burst mode
- ISO range of 100 - 6400
- Art Filters feature
- Full manual controls
- 720p HD movie mode with sound
The Olympus E-P1 is a lot smaller than its Micro Four Thirds cousins from Panasonic as it dumps the optical viewfinder and protruding grip, in favor of a flat, more rectangular design (think the shape of Olympus’ old E300/E330).
On the outside, the Olympus E-P1 is a great concept… but is it worth checking out? We’re going to find out now.
Size and Weight
(326.8) 145.5 x 107.8 x 73.5 mm (730 g) – Canon EOS 50D
(288.2) 128.8 x 97.5 x 61.9 mm (480 g) – Canon Digital Rebel T1i aka EOS 500D*
(284.0) 126.0 x 94.0 x 64.0 mm (495 g) – Nikon D60
(311.0) 127.0 x 104.0 x 80.0 mm (560 g) – Nikon D5000*
(284.0) 130.0 x 94.0 x 60.0 mm (475 g) – Olympus E620
(226.9) 120.6 x 69.9 x 36.4 mm (335 g) – Olympus E-P1*
(258.8) 124.0 x 89.6 x 45.2 mm (385 g) – Panasonic Lumix G1/GH1*
(281.0) 122.5 x 91.0 x 67.5 mm (525 g) – Pentax K2000 aka K-m
(296.7) 128.0 x 97.0 x 71.7 mm (490 g) – Sony Alpha A380
*Features a movie mode (Video recording with sound)
All the weight figures above show when the camera is empty without any lens, battery or memory card
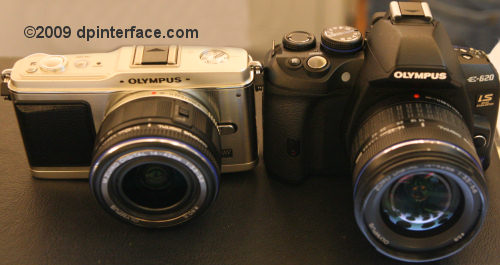
The Olympus E-P1 is the smallest interchangeable lens camera in the market at the moment. The E-P1 is quite a bit shorter and shallower in terms of size thanks to the removal of the viewfinder ‘hump’ and prominent right hand grip commonly found on other SLRs or even prosumer cameras.
The E-P1 isn’t a ‘pocket’ compact, however – even if you try to carry the camera and its lens separately, neither is small enough to fit in your pants pocket.
Box packaging
The Olympus E-P1 comes with an average bundle:
- BLS-1 rechargeable lithium-ion battery
- Battery charger
- Body cap
- Neck strap
- USB and video cables
- Camera software disc (Olympus Master)
- User’s manual
- Olympus M Zuiko Digital 14 – 42 mm f3.5 – f5.6 lens (with kit lens option)
- Olympus 17 mm f2.8 lens (with pancake lens option)
- External viewfinder (with pancake lens option)
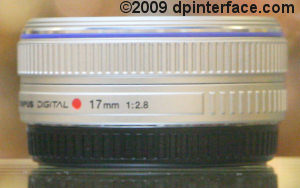
The Olympus E-P1 can be bought body only (RRP of $750), with the 14 – 42 mm kit lens (RRP of $800) or with the 17 mm pancake lens and optical viewfinder ($900). The external viewfinder comes as an attachment that fixes itself to the camera’s hotshoe and only provides fixed coverage for the 17 mm pancake lens.
Just like other interchangeable lens cameras out there, the Olympus E-P1 doesn’t come with a memory card neither does it have any built-in memory. Since they probably wanted to keep the camera’s size down, the E-P1 doesn’t have the dual memory card slots of Olympus’ typical digital SLRs (CF+xD). Instead, Olympus brought about a refreshing change - the E-P1 is the first Olympus camera in recent memory which does NOT use the (proprietary) xD-Picture card format; dumping it in favor of the more commonly used SD/SDHC cards.
As for card recommendations, a 4 GB card would be good for starters; make it a high-speed one if you plan to get the most out of the camera. If you’re planning to use the E-P1 for its 720p video capabilities, or RAW image mode, be my guest and get a few extra memory cards.
500 shots – Canon Digital Rebel T1i aka 500D
190 shots – Canon Digital Rebel T1i aka 500D (LCD live view)
500 shots – Nikon D60
510 shots – Nikon D5000
210 shots – Nikon D5000 (LCD live view)*
500 shots – Olympus E620
200 shots – Olympus E620 (LCD live view)*
300 shots – Olympus E-P1 (LCD live view)
300 shots – Panasonic Lumix GH1 (LCD live view)
330 shots – Panasonic Lumix G1 (LCD live view)
640 shots – Pentax K2000 aka K-m
500 shots – Sony Alpha A380
230 shots – Sony Alpha A380 (LCD live view)
*In-house testing done by DPInterface. Our tests were conducted as close as possible to CIPA’s procedures
All the cameras above are rated with rechargeable batteries according to CIPA Standard; when using the viewfinder, unless noted otherwise
The Olympus E-P1 uses the same BLS-1 lithium-ion rechargeable battery as some of Olympus’ other digital SLRs and comes with a charger. The camera gets about 300 shots per charge (CIPA Standard) using the LCD, which is on-par with the other two ‘live view only’ cameras from Panasonic and above average compared to the numbers produced by other digital SLRs in live view mode. However, with live view turned off, other ‘conventional’ digital SLRs are able to perform 60 to 70% better in terms of battery life.
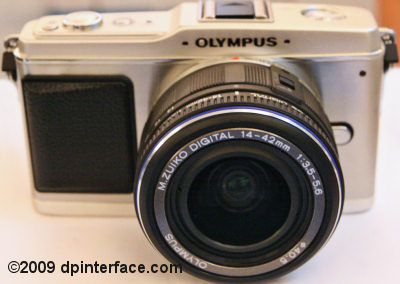
Retractable 14-42 mm kit lens
The E-P1’s kit lens is special, and I’d like to take a moment to talk about it a little. To reap the most out of the ‘compact enough to bring around’ concept of the Micro Four Thirds system, Olympus made a new kit lens for the E-P1 to keep the camera’s overall size as small as possible. The 14-42 mm M Zuiko lens is the first interchangeable lens that’s ‘retractable’.
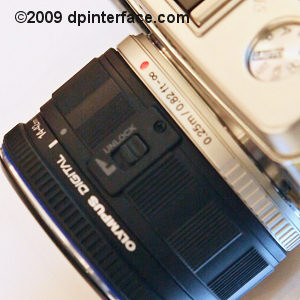
Just like in a compact camera where the lens retracts into the camera body, this lens can collapse into the main lens housing when not in use for easier storage and less protruding bulk when carrying around. To retract the lens, just pull the ‘unlock’ switch and rotate the lens into the ‘closed’ position (indicated by the small gray dot).
When it’s time to take pictures, turn the zoom ring and the rest of the lens construction magically pops out. I’m sure there will be people wondering about the lens cap – so, yes, you can attach the lens cap at any time since the filter thread ring is located at the outer-most barrel, not the main lens housing. The camera is also intelligent enough to know if you forgot to extend the lens and will display an on-screen notice.
Accessories
Despite being in the rather new Micro Four Thirds system, the Olympus E-P1 is still pretty expandable. The E-P1 fully supports the six Micro Four Thirds that currently exist: Olympus’ 14-42 mm kit and 17 mm pancake as well as Panasonic’s 7-14 mm, 14 – 45 mm, 45-200 mm and 14-140 mm lenses. The E-P1 is also able to take ‘full-sized’ Four Thirds lenses as well as Olympus OM lenses via their respective adapters (which cost around $175 each), though only some Four Thirds lenses will autofocus with the camera. All lenses mounted on the camera will be subjected to the sensor’s 2.0X focal length multiplication factor.
You can also add on external flash units to the camera, including the new, fixed position FL-14 flash that Olympus released with the E-P1. Olympus has FL-36R and FL-50R flash models, both of which support wireless flash functionality. You can also opt for third party flash units, but only Olympus models will sync automatically with the camera.
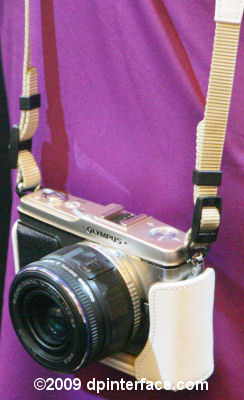
One interesting accessory is a leather body jacket (or at least faux-leather) which acts as a protective case around the camera’s body while preserving accessibility to all controls and the lens. Olympus does not offer a battery/portrait grip option for the E-P1 – apparently it’s meant to be used like a rangefinder/street photography camera. There doesn’t seem to be any AC adapter or remote control options available for the camera either.
Camera Tour
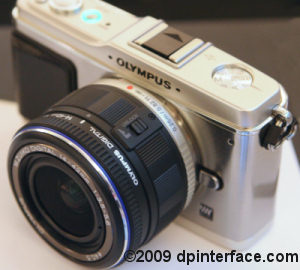
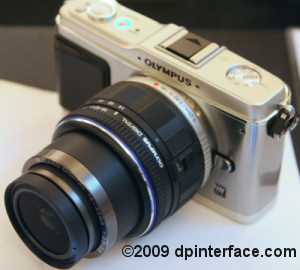
The Olympus E-P1 is a nice change in a monotonous world of big, black and bulky digital SLR cameras. The E-P1 looks very much like an oversized compact camera (an oversized Lumix LX3 to be precise) with excellent build quality. The camera is put together very well and despite lacking a ‘real’ right hand grip, surprisingly easy to hold. All of the camera’s controls are located on the right side, making single-handed operation possible with a prime lens.
In terms of ergonomics, the E-P1 has nicely sized buttons and controls. The rotary dial + navigation pad combo is easy to use and there’s good tactile feedback whenever it’s rotated. The other two dials on the camera gave good tactile feedback as well, except the mode dial ‘back dial’ is a bit recessed for my liking and the main command dial (upper right side) is not wide enough for large thumbs.
The E-P1 itself will be available in your choice of silver with black accents (the camera that you see here) or a less common, white with beige accents. The E-P1’s 14-42 mm kit lens will also come in two colors: your choice of black or white.
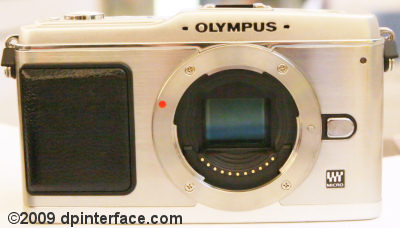
The E-P1 has a Micro Four Thirds lens mount with a 12.3 effective megapixel LiveMOS sensor inside the camera’s body (apparently the same sensor Olympus uses in their SLRs). You can attach any Micro Four Thirds system lens as well as normal Four Thirds and Olympus OM lenses onto the camera; with the usual 2X crop factor of the sensor. The crop factor means any lens you attach will be subjected to a 2X multiplication factor (ie the E-P1’s 14 – 42 mm kit lens becomes equivalent to 28 – 84 mm in 35 mm terms).
The Olympus E-P1 is also the first Micro Four Thirds camera to feature built-in image stabilization, that is, sensor-shift stabilization (Panasonic’s offerings had lens-based stabilization instead). The camera’s sensor-shift image stabilization system allows you to work down to 4 stops slower than normal handheld shots. There’s Olympus’ SuperSonic Wave Filter dust reduction system as well, which works very well by ‘shaking’ off the dust on the filter in front of the sensor
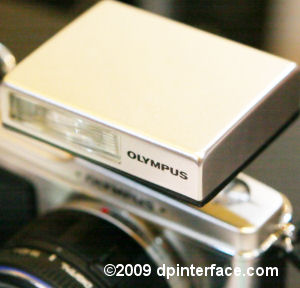
the camera does not have a built-in flash
The Olympus E-P1 does not have any built-in flash - I don’t see how Olympus could’ve included one anyway, without increasing the camera’s size or putting it in an off-center position. I’m not a big fan of built-in flashes myself since they are relatively weak and inflexible (cannot be ‘bounced’), but for some people, this may be an issue. The E-P1 doesn’t have any AF-assist light either, so if you need a flash or AF assist, you’ll have to buy an external flash.
Directly above the lens mount are the E-P1’s dual microphones, used for recording stereo sound in movie mode (the two small holes that flank the Olympus logo). To the right side of the camera is the lens release button and tiny self-timer lamp.
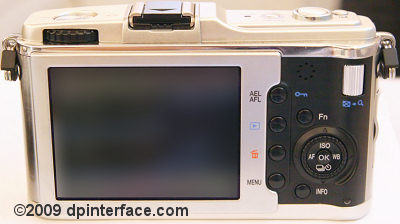
The Olympus E-P1 features a 3 inch LCD with just 230,000 pixels on its back; not something we’d expect to see on a camera like this one. For the record, Panasonic’s G1/GH1 cameras (and even the compact Canon SD970) have 3 inch screens with 460,000 pixels and there are digital SLRs with screens that have even more resolution; up to 920,000 pixels. The comparatively low resolution of the E-P1’s screen isn’t a huge issue (the display image is decent) but a higher resolution display would’ve been nice for a camera of this price… if you’ve used those VGA 3 inch screens before, be it on another digital SLR or even your mobile phone, then you WILL notice the difference here.
Back to the subject on hand, the E-P1’s screen showed decent visibility in bright conditions (you may have to tilt the camera a little to see the LCD on a sunny day) and very good low-light visibility (the screen image brightens so you can see what you’re shooting). The E-P1 doesn’t have any optical or electronic viewfinder, so you’ll be relying completely on the LCD for composing your photos. The optional external viewfinder offered by Olympus doesn’t count as a viable alternative to the LCD as it has fixed coverage only for the 17 mm pancake lens and takes up the flash hotshoe.
To the upper left of the LCD is the mode dial’s “back dial” – since the mode wheel itself is recessed, you control it via this dial. I found the dial doesn’t protrude enough from the little chrome ledge, making it a little difficult for larger thumbs to operate.
Jump over to the other side of the camera, and that’s where almost all the controls are… and at the location where your thumb would typically rest, there’s the speaker and command dial. The command dial is used for adjusting settings, navigating menus and magnification (like playback zoom), though the dial is on narrow side.
Now, we can get to the various buttons on the back of the E-P1. Operation should be straightforward here with the uniformly, well-spaced buttons which have clear labels beside/on them. I’ll list down the four buttons in the row next to the LCD:
- Focus/exposure lock (customizable in the camera’s Custom Menu)/image protection
- Playback button
- Delete photo button
- MENU button
Simple, huh? Moving on, we have the customizable Function button and INFO button used to toggle the information/control panel type shown on the camera’s display. Then there’s the five way navigation pad with a rotary wheel around it. The rotary wheel is used for navigating menus and going through certain settings, and gives a nice tactile ‘click’ each time you turn it. The navigation pad on the other hand, is used for item selection, panning around images (ie playback zoom) and also provides direct access to a few functions like you would find on a compact camera:
- Up – ISO sensitivity (Auto, 100 – 6400 in choice of 1/3 or 1 step increments)
- Down – Drive mode (One shot, continuous mode, self timer 2 or 12 seconds)
- Left – Autofocus mode (Single, continuous, manual, single with manual override)
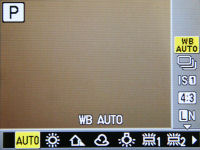
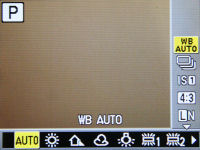
- Right – White balance (Auto, daylight, cloudy, shade, tungsten, fluorescent [white, neutral or daylight[, flash, custom, color temperature)
- Center – OK/Super Control Panel/Live Control
The ‘Left’ button on the navigation pad can also be reassigned to another function (either metering mode, LCD backlight, image stabilization mode or flash mode). The functions available for the FUNCTION button include toggling face detection, manual focus, RAW mode, My Mode, LCD backlight, custom white balance, default focus point, test shot or you can just leave the Function button… without a function.

The E-P1 also features advanced white balance controls – you can either set color temperature (from a range of 2,000 to 14,000 Kelvin) or adjust white balance up to +/-7 steps along the amber-blue and green-magenta axis’s respectively. White balance bracketing is also available for the latter.

Over here, on the left side, is the Olympus E-P1’s mode dial:
- Movie mode
- Scene modes
- Art Filters – Pop art, soft focus, pale & light, light tone, pinhole and grainy film
- Intelligent Auto mode – Just point-and-snap. There’s automatic scene mode selection incorporated into this mode and will pick one of five preset modes (portrait, landscape, night, sports or macro)
- Program mode – the camera will select both shutter speed and aperture; there’s Program Shift available so you can tweak the shutter/aperture combinations
- Aperture priority – pick an aperture value (depends on lens) and the camera will select a matching shutter speed
- Shutter priority – pick a shutter speed (between 1/4000 to 60 seconds in your choice of 1/3, 1/2 or 1 step increments) and the camera will select a matching aperture value
- Manual mode – you get full control over both shutter speed and aperture; bulb mode up to 30 minutes available
Next to that is the camera’s external flash hotshoe. You can use any flash with the camera but only Olympus ones will sync automatically with the camera. The Olympus E-P1 can sync as fast as 1/180 sec with an external flash or up to 1/4000 using Super FP mode with an external flash.
Towards the right side, there’s the E-P1’s dust reduction status lamp and three final buttons: the power button, shutter button and exposure compensation button (Exposure compensation up to +/- 3 EV in your choice of 1/3, 1/2 or 1 step increments).
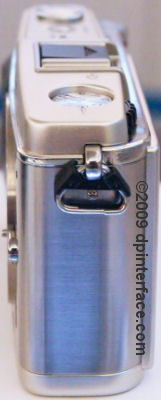
This side of the camera is blank.
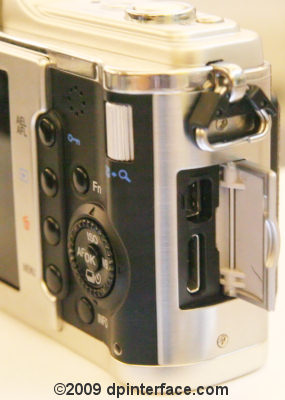
The E-P1 has two connectivity ports on its right side – one combo port for USB and A/V Out and one mini HDMI port for connecting the camera to your high definition TV. A metal-hinged door protects these two ports and keeps them out of sight when they’re not in use.
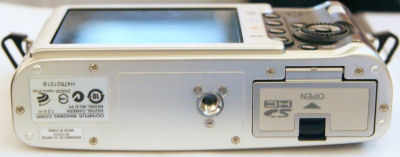
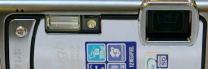
At the bottom of the Olympus E-P1 are its metal tripod mount (unfortunately, it isn’t in-line with the lens) and battery compartment. The compartment door has a sliding switch so you don’t accidentally open it… and there’s Olympus showing off the camera’s SDHC compatibility (yea, I really hope they dump the xD-Picture card format on their other cameras too).
Taking pictures (Shooting mode)
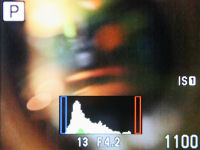
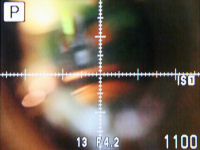

The Olympus E-P1 is, as you know, a camera that relies solely on live view and live view only. On its 3 inch screen, the E-P1 shows 100% of the frame with shooting and exposure information. With that, the E-P1 shows you a real time image preview of your picture’s exposure, white balance, etc and even the different effects of Art Filters (if you’re using the Art Filters mode on the camera. There are also a choice of 3 framing gridlines, a live histogram and focus enlargement.
There’s a gauge level indicator view available on the E-P1 as well. The gauge indicator acts like an ‘electronic bubble level’ and allows you to take level shots by simply adjusting the camera until the grid lines light up green.
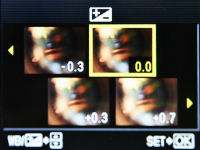
You can even view the different effects of various settings (ie white balance, exposure) via the E-P1’s Perfect Shot Preview feature, which splits the screen to show four setting change effects simultaneously.
Live Control menu
The E-P1 has what Olympus calls a Live Control menu, brought up by hitting the Center/OK button on the navigation pad. This menu contains a list of camera settings which you can change, much like the Function and Quick menus found on compact cameras:
- Scene mode (only visible in Scene mode)
- Art Filter choice (only visible in Art Filter mode)
- Movie AE (only visible in movie mode)
- White balance
- Drive mode
- Image stabilization mode (Off, mode 1, mode 2, mode 3)
- Photo resolution, compression and aspect ratio
- Flash mode; only works if there’s a flash attached to the camera (Auto, redeye reduction, on, off, slow sync with redeye reduction, slow sync curtain 1, slow sync curtain 2)
- ISO sensitivity
- Metering mode (Multi, center-weighted, spot)
- Autofocus mode
- Face detection On/Off
- Focus area
- Movie sound recording On/Off (only visible in movie mode)
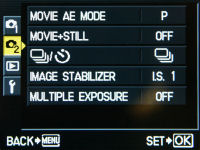
The Olympus E-P1 has three sensor-shift image stabilization modes – Mode 1 is your usual ‘compensate for camera shake’ image stabilization while Mode 2 and Mode 3 are for horizontal and vertical panning respectively. I wished Olympus put some sort of tooltip or indicator for each image stabilizer mode instead of just calling them IS 1, IS 2 and IS 3 in the menu.
Multi Exposure
The Olympus E-P1 has a Multi Exposure feature (as seen on recent Olympus digital SLRs) which allows you to combine two pictures into one. An auto gain function you can activate and this evens out exposure of combined photos.
In shooting mode, you can combine up to two pictures – so after you take the first photo, the image appears on-screen as a semi-transparent overlay while you compose the second shot to be combined with the first one. Multi Exposure works in playback too, and allows you can combine up to four photos. The catch here is that images must be taken in RAW format to be combined in playback.
Shooting settings
The Olympus E-P1 has a whole lot of image resolution options; including 12 MP, 7.7 MP, 5 MP, 2 MP, 1.3 MP, 1 MP and VGA, along with numerous image compression: Superfine, Fine, Normal and Basic, and four aspect ratio settings (4:3 standard, 3:2 print, 16:9 widescreen or 6:6 square). The E-P1 has a RAW mode as well, with file sizes at around 14 MB per shot.
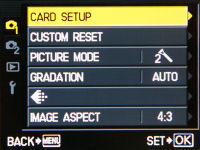
Unlike the simple grid menus on their compact cameras, the menus on Olympus digital SLRs are more comprehensive and are split into five main tabs. The first two of which on the Olympus E-P1 cover shooting functions:
- Card setup (Erase all, format)
- Reset settings
- Picture mode (Vivid, natural, muted, portrait, monotone, custom)
- Gradation (Auto, normal, high key, low key)
- Image resolution and compression/Video resolution
- Aspect ratio (4:3 standard, 3:2 print, 16:9 widescreen or 6:6 square)
- Movie AE mode
- Movie + Still
- Drive mode
- Image stabilization mode
- Multiple Exposure
Picture Modes
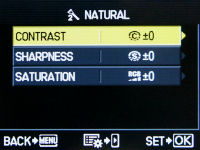
The Olympus E-P1 has five preset Picture Mode options along with a custom one. The preset Picture Modes include Vivid, Natural, Portrait, Muted and Monotone. For all of the Picture Modes, presets and custom, you can adjust sharpness, contrast and saturation levels with 5 levels for each of them. For the Monotone option, the saturation option is replaced by filter and toning options. You can set which color to filter out (yellow, orange, red or green) and the tone of the final monochrome photo (Yellow, orange, red, green or sepia).
There’s also gradation adjustment available (automatic, normal, high key or low key) which evens out exposure in photos by dividing a photo into small parts and optimizing contrast. High key prioritizes bright areas while low key prioritizes shadow/dark areas. The E-P1 has two color space options: sRGB and AdobeRGB.
Bracketing
The Olympus E-P1 has four bracketing modes. The first two are pretty common in cameras which have manual controls: exposure bracketing takes three shots in a row in 1/3, 1/2 or 1 step intervals, as well as flash intensity bracketing, which does the same up to +/-3EV in terms of flash exposure compensation.
There’s ISO bracketing which takes three photos in a row, also in 1/3, 2/3 or 1 step increments, this time using different ISO values. Finally, there’s white balance bracketing if you’re using the white balance adjustment setting. White balance offers the ability to take three pictures up to +/- 2, 4 or 6 on each axis (amber-blue or green-magenta).
Custom Function menu
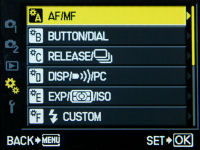
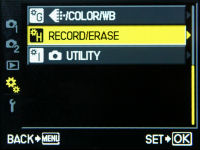
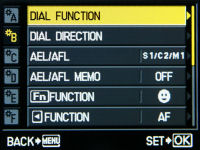
The Olympus E-P1 includes many custom functions, which are organized into nine categories in its Custom Menu. Do note that the Custom Menu is unavailable by default; you’ll have to turn it on via the Setup Menu in order for the icon to appear.
- A. Autofocus/Manual focus section – Select Live View mode (covered in the sub-section above), select autofocus area, mode, focusing in bulb mode, lens reset and focus ring direction
- B. Button/dial programming – Determine the camera’s actions/functions when you turn the top command dial, press the AE/AF lock button, Function button and left button on the navigation pad. You can also set 2 My Modes and button inactivity period
- C. Release priority – determine whether the camera takes a picture even if focus isn’t locked; with separate controls for single AF and continuous AF
- D. Display/PC – Set TV/PC connectivity settings, toggle live view boost & face detection, level gauge and amount of information shown in shooting/playback. There’s also slideshow setup and an option to toggle sound recording on/off in movie mode here
- E. Exposure/Metering/ISO – Set ISO and exposure step increments (1/2, 1/3 or 1 full stop), Auto ISO range, preset bulb mode period and mirror lockup delay (AKA anti-shock, as Olympus calls it). There’s also a bunch of stuff here to set up the E-P1’s four bracketing features and metering mode
- F. Flash settings – Set up flash sync speed, minimum shutter speed when using flash and flash exposure compensation
- G. Quality/Aspect/Color/White balance – Covers noise reduction, white balance settings, vignetting reduction and even customize the ‘preset’ image resolution and aspect ratios
- H. Record/Erase – Determine how the camera names picture files (default is Pxxxyyyy where x is the folder number, y is the image number), set photo DPI and a whole lot of settings covering ‘how photos are deleted’
- I. Utilities – Pixel mapping, exposure shift, battery warning and level meter adjustment
There’s one feature worth covering from the AF/MF section – since Micro/Normal Four Thirds lenses use electronic manual focusing (The lens is electronically directed when you turn the focus ring; not direct control over a focus element), you can choose whichever turning direction you’d like to use with the camera. That’s quite a neat feature.
Not only can you control the focus ring direction, but the Olympus E-P1 also offers a lot of customization in terms of its controls. You can set the action and direction of the command dial as well as three of the camera’s buttons.
The Olympus E-P1 features a mirror lock up function, which Olympus calls Anti Shock Release, and you can select the delay time from 1 to 30 seconds. I’ve explained pretty much everything of the next few sections in the Custom Menu until the Utilities section which holds two very interesting features. The Pixel Mapping feature allows you to map and remove hot pixels and dead pixels from the camera’s sensor.
The E-P1 is somewhere between a digital SLR (in terms of controls and expandability) and a compact camera (things like movie mode and a few features); but Olympus decided to take the easy way out and just ported their SLR menu system over to the camera, and added and removed menu items as necessary. So Olympus SLR owners can just pick up the camera and begin using it. If you’re new to SLRs (or just Olympus cameras), you don’t have to worry about memorizing the lengthy list of settings and functions, since most (yes, I said most, not all) of the items in the Custom Menu either ‘set once and leave it’ or some don’t need to be touched at all!
Setup menu
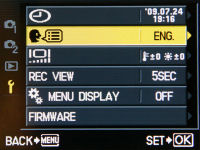
The final tab in the E-P1’s menu system covers setup (I’ll talk about the Playback section later). There are only six items in the Setup area:
- Set date and time
- Set camera language
- LCD brightness and color
- Image review time
- Display Custom Menu
- Camera and lens firmware version
Art Filters
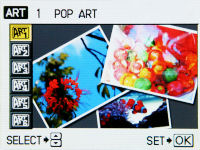
The Olympus E-P1 has the same set of 6 Art Filters found on the Olympus E620 SLR that enables you to apply six preset effects without touching a computer:
- Pop Art – Increases color saturation and brightness
- Soft Focus – Lightens and softens photos
- Pale & Light – Flattens colors to give photos a dull look
- Light Tone – Increases brightness in dark areas to create even exposure throughout the picture
- Grainy Film – Increases contrast while turning photos black-and-white for that ‘classic’ look
- Pin Hole – Makes colors warmer looking while creating artificial, excessive vignetting in photos


One note is that photos in Art Filters mode can only be shot in JPEG mode. If you shoot in RAW, the effects will not be automatically applied to photos… for some reason, however, you can apply Art Filters to RAW photos AFTER you take a shot and convert it into a JPEG picture (ie using the playback tool).
Other scene modes and macro
Having discussed the Olympus E-P1’s exhaustive list of menu items and features, let’s move on to some simpler things like scene modes. The E-P1 has a good selection of point-and-shoot scene modes which cover portrait, landscape, landscape with portrait, sports, night scene, night portrait, children, high key, low key, digital image stabilization (This merely boosts ISO as high as needed), normal and nature macro, candle, sunset, fireworks, documents, panorama, beach & snow and E-Portrait. E-Portrait mode works much like the ‘Beauty modes’ on Olympus compact cameras, removing blemishes and wrinkles, and smoothening skin automatically.
The minimum focusing distance depends on the lens being used on the camera. There are currently no dedicated Micro Four Thirds macro lenses. However, Olympus does make two ‘normal’ Four Thirds macro lenses – the 35 mm f3.5 macro and 50 mm f2.0 macro.
Video Recording
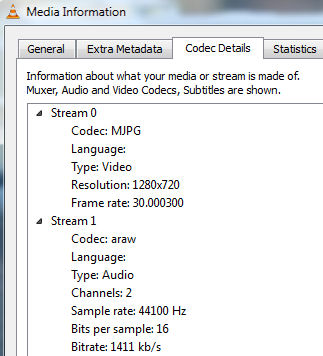
The Olympus E-P1 is the first ‘large sensor’ camera to feature a movie mode; previously, no Olympus digital SLR had the ability to record video. You can record 720p HD movies (1280 x 720) at 30 FPS with stereo sound on the Olympus E-P1. Movies are recorded in M-JPG format with sound recorded at 44.1 kHz. As with other cameras, the E-P1 has a 2 GB per movie clip file size limitation here. You also have the option to lower recording resolution to VGA (640 x 480)
There are a couple of things you can and cannot do in the E-P1’s movie mode. You CAN operate the zoom lens and activate continuous autofocus, though focusing is sluggish and noisy if you choose to turn continuous AF on. You can NOT, however, use sensor-shift image stabilization while recording movies, neither can you attach an external microphone to the camera (unlike Panasonic’s GH1 which has a microphone jack).
The E-P1 gives you the ability to control aperture value, as well as use the camera’s Art Filters via the Movie AE mode. As with the camera’s live preview feed, movie frame rates drop to a choppy rate if you choose to use Art Filters while recording. You can’t take a full-sized still photo while recording movies – the misleadingly named “Movie + Still” option merely saves the final frame at the end of a movie as a still picture.
While video quality was fairly good, I can’t say that the E-P1 will be replacing your camcorder anytime soon…
DPInterface YouTube channel available at youtube.com/dpinterface
Performance
All performance testing of the Olympus E-P1 was performed using a high-speed 8 GB SanDisk Extreme IV SDHC card. A high-speed memory card is definitely recommended if you want to get the most out of the camera in terms of performance.
The Olympus E-P1 has a noticeable startup time of 1.5 seconds and is ready to go after completing the dust reduction process (which cannot be cancelled). If you’re coming from a compact camera, then you might not notice… while the seasoned digital SLR user may be wondering why a camera, positioned alongside SLRs, starts up so sluggishly.
Focusing wasn’t much better either - the Olympus E-P1’s contrast-detection focusing was below average. With good lighting around, it typically takes 0.5 to 0.8 seconds for the camera to focus (using the 14-42 mm kit lens and 17 mm pancake). A digital SLR in similar conditions would be able to focus almost instantly; even the Panasonic GH1 can do it faster than the E-P1. Low-light focusing was even worse, the camera had a miserable time in trying to even lock focus in dim conditions. Even with a large aperture lens, focusing can take a couple of seconds (two, sometimes three) if there isn’t a lot of light around.
- Shot-to-shot speed - 1 shot as fast as you can press the shutter button; very fast
- Flash recharge time using a fully charged battery – The E-P1 has no built-in flash
The E-P1 has a single continuous shooting mode that snaps at a flat 3 frames per second at full resolution. You can take pictures until the memory card fills up if you’re in JPEG/Fine mode, up to 13 JPEG/SuperFine or capture up to 6 RAW images in a row.
In terms of performance, the Olympus E-P1 performs much like the typical entry-level digital SLR (save for focusing, where SLRs do much better) with a 3 FPS burst mode, decent shot-to-shot and speedy writing of images to the memory card. The Olympus E-P1 definitely isn’t a quick camera when it comes to focusing; eclipsed by digital SLRs, its own cousin; the Panasonic GH1 and even surpassed by a handful of compact cameras if you’re trying to shoot in low-light (even when using a bright lens). I don’t know how Panasonic’s very similar offering can focus almost two to three times as fast, and sit in the ‘digital SLR’ range… but one thing’s for sure, Olympus definitely needs to learn a trick or two from them when it comes to contrast-detection autofocus.
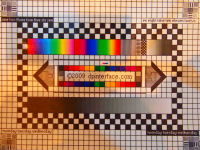
Image Quality
Time to take a look at the Olympus E-P1’s image quality:


All test shots, here and in the photo gallery, were taken using the default ‘Natural’ Picture Mode with Noise Reduction off and gradation off.
If there’s one thing you can expect from a camera with a large image sensor (at least bigger than the fingernail-sized sensors in point-and-shoots), it’s low noise. Image quality from ISO 100 to 400 is excellent; clean and sharp. Noise at the E-P1’s ISO 800 setting remains low.
Image quality still remains very usable, even for large prints, with good detail levels and slight noise at ISO 1600. ISO 3200 isn’t out of the question either, if all you’re going to do is make mid-sized prints or use as your desktop wallpaper.
ISO 6400 is a different story; photographers who are unwilling to do a lot of work with photos should leave ISO 6400 untouched. RAW shooters and people who love working in their ‘digital lightroom’ (AKA Photoshop or a photo editor of your choice) should be able to work with ISO 6400 to savage a medium-sized print.


If you compare the crops closely (though the E620 crops should’ve been brighter), Olympus used a different imaging processor – hence, perhaps the slight change in noise handling – with the E-P1 and the E-P1 shows a small improvement in terms of noise.
Lens distortion, edge sharpness and color fringing (chromatic aberration) levels depend very much on the lens being used. With the Olympus M-Zuiko Digital 14 - 42 mm kit lens, there was relatively mild distortion and some edge softness. What’s surprising here is the extremely low levels of chromatic aberration (color fringing) and the ability to resolve a lot of details – quite impressive for a kit lens, especially one that had to be designed with compactness as a priority.
There are five other Micro Four Thirds lenses (Four of which are from Panasonic) and the full range of ‘normal’ Four Thirds lenses that you can use with the E-P1, though only dedicated Micro Four Thirds lenses are guaranteed to autofocus with the camera.
Since the Olympus E-P1 has no built-in flash, I didn’t manage to run my usual redeye tests with the camera. If you use an external flash with the camera, the chances of redeye appearing in photos are low (due to the height of the flash from the lens, among other things). In case you DO bump into the rare case of redeye, the Olympus E-P1 has a redeye removal tool in playback mode.
The Olympus E-P1 performs well in the image quality department with good sharpness and details in photos as well as low noise. Noise levels are slightly better than that of the E620 (not a world of difference though, the E620 is still a nice camera) and the new Micro Zuiko retractable kit lens is quite good for a bundled SLR lens. For street shooting and times where you need good image quality paired with a camera that’s smaller than your digital SLR, the Olympus E-P1 fits the bill nicely. It’s only when you look back at the camera’s poor focusing performance in low-light that you figure you’ll need at least an external flash and/or good lighting in order to make full use of the E-P1’s good image quality.
Dynamic range on the E-P1 was average (on par with similar digital SLR cameras); it does occasionally blow out highlights in high contrast, mostly outdoor scenes. As with the case of the E620, setting gradation to Auto or On will help in brightening dark areas of photos but this is only effective in well lit conditions. In low-light, the difference is unnoticeable.
Photo gallery
Check out full-sized, unedited photos taken straight out of the camera in the Olympus E-P1 photo gallery.
Playback
The Olympus E-P1 has a very good playback mode. You can browse photos with 14X magnification available to confirm focus and details; and also enjoy video plyaback with sound. The usual playback basics are here: print marking, slideshows (now with fancy music and transition effects), voice clip attachment, image protection and auto rotation.
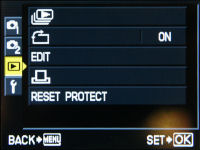
You can playback photos/videos individually, by date in calendar view or your choice of 4 to 100 thumbnails. The E-P1 features a ton of playback tools under the ‘EDIT’ section, but all are the usual Olympus digital SLR affair and can only be used on still photos – means no video editing tools here, folks.
First off, there’s a RAW processing tool (called RAW edit) that lets you to process RAW files into JPEG photos directly in the camera – which is a feature I appreciate a lot and often wish that every camera had it. You won’t get a whole comprehensive suite of controls and features as you would in a computer; but you can manipulate some basic settings (such as brightness, art filter setting, white balance, etc) before converting a RAW image into a JPEG photo. However, the implementation here on the E-P1 isn’t the best since you first have to select a photo, then pre-set everything in shooting mode such as white balance (which will affect the outcome of the photo) and re-enter playback mode to convert the file – kinda clumsy.
A ‘Multi Exposure’ playback feature is also available; it allows you to stack two to four pictures to be combined into a single photo. The catch here is that you can only select RAW images to be combined.
In terms of JPEG editing, you can apply Shadow Adjustment (brighten dark areas of your photos), redeye removal, adjust saturation and change the aspect ratio of photos. You can also resize pictures or convert them into black & white or sepia, if desired. A new feature here is “E-Portrait”, which is exactly like the ‘Beauty Retouch’ tool on Olympus’ compact cameras – when applied to photos in playback, E-Portrait removes wrinkles and blemishes as well as smoothens the skin of your subjects.
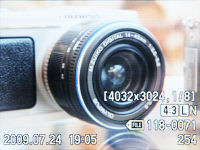
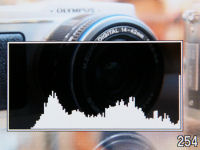
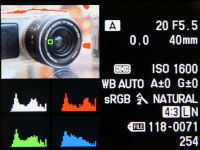
By default, the Olympus E-P1 only shows the basics of your photos in playback, that is, image resolution/compression and shutter speed. Press the INFO button and the E-P1 can tell you a whole lot more: from shooting details, mode, full exposure information (with shutter speed and aperture value) and four histograms on screen – Brightness and RGB! There’s also a ‘brightness histogram only’ view (middle screenshot) as well as a highlight/shadow alert feature which “blinks” both underexposed and overexposed areas of your photos to warn you about them.
Conclusion
The Olympus E-P1 is probably the most anticipated Olympus camera since the announcement of the Micro Four Thirds system and the ‘wooden, compact interchangeable lens’ prototype shown by Olympus some time ago. When I first used the Olympus E-P1 and started to get accustomed to it, I couldn’t help but notice the similarities between the E-P1 and E620’s feature set with just a few differences here and there – almost as if Olympus put the guts of the E620 into a more compact and stylish body; complete with a retro look resembling the Olympus PEN camera from half a century ago, and called it the E-P1. It’s ironic that two different cameras, which look completely unlike each other, aimed at slightly different audiences, would be so similar deep inside. 12 megapixels, a fixed 3 inch LCD (which should have more resolution, in my opinion) and the standard Olympus SLR user interface – ring any bells?
Ergonomics and build quality of the Olympus E-P1 were surprisingly good, considering the camera lacks a proper right hand grip. The camera has two control dials, the skinny silver main dial and rotary wheel around the navigation pad, which is fairly rare in this class – equivalent digital SLRs typically have a single command dial. The E-P1 also has two other differences that separate it from the typical digital SLR form-factor (other than the lack of a mirror box); it does away with the viewfinder and built-in flash (basically the ‘flash hump’ on top) completely in favor of a sleeker, Lumix LX3-like design. The lack of a viewfinder and internal flash may bother some people, but there are others who may not care at all.
One thing that’s definitely an issue is that the E-P1 lacks an autofocus assist lamp – on their digital SLRs, Olympus would use the ‘flash strobe’ assist method, but since the E-P1 hasn’t a built-in flash, you’re out of luck. The only solution would be to get an external flash, which may help matters a little. The other qualm about the E-P1 is its relatively sluggish (versus its rival-cousin Panasonic GH1 and conventional digital SLRs alike) focusing. In well-lit conditions, the difference is noticeable yet tolerable since focusing speeds are closer to that of a compact camera, rather than an SLR. The camera really has a hard time focusing – being unable to focus in low-light without an AF-assist system or bright lens. Even with help (from a large aperture lens such as the 17 mm pancake), expect focusing to take up to a couple of seconds in dimly-lit places, as the camera nervously shifts focus back and forth before locking onto your subject. And the chance of the camera failing to focus completely still exists here too.
But here’s where the similarities between the E-P1 PEN and digital SLRs start to become clear. The E-P1 has a very similar feature set to its digital SLR counterparts, especially the E620 I reviewed a while ago. Full manual controls, white balance tweaking and color temperature selection, RAW image mode, a huge long list of Custom functions: they’re all here. Not to mention you can interchange lenses, including normal Four Thirds, Leica and Olympus OM lenses, as well as modify the functions of two customizable buttons, the AE/AF lock button, dials and even the electronic focus ring turning direction. Performance, excluding the camera’s substandard focusing, was good as well. A 3 frame-per-second burst mode, quick processing times and shot-to-shot speed are all in-line with what you’ll experience even in an entry-level digital SLR.
As if the E-P1 isn’t enough of a bridge between the digital SLR and compact camera worlds, Olympus have included a movie mode with the camera. The E-P1 can record 720p HD movies at 30 FPS with stereo sound, and comes complete with continuous AF and aperture adjustment. But all that merely looks good on paper – there are a couple of limitations such as the inability to activate sensor-shift image stabilization, noisy and sluggish focusing (if using continuous AF) and you can’t even take a still picture while filming a video clip. Movies look good (though not tremendously so); the Olympus E-P1 will serve you well for the occasional movie clip but not when you’re trying to replace your camcorder with it.
Image quality produced by the Olympus E-P1 ranged from good to very good, depending on what aspects you look at. I found noise levels to be low and usable till ISO 1600; photos had just the right amount of sharpness and high levels of detail. Other things like distortion and overall resolution/corner-to-corner sharpness depend highly on the lens used, but rest assured, the E-P1’s 14-42 mm kit lens was no slouch (unlike the typically mediocre to so-so kit lenses bundled with other digital SLRs). There was moderate distortion, some edge softness but very little color fringing, that’s close to unnoticeable most of the time – those characteristics are pretty good for a kit lens, even more so when you consider the E-P1’s lens that’s retractable and compact in size.
The Olympus E-P1 is a great concept, a rather compact camera with a big sensor, aimed at those hounding for a portable photographic device with good image quality (those who don’t want to carry a big SLR and a bag full of lenses). And looks like that concept is working – the E-P1 is indeed a good camera (but not without its flaws) and a close friend of mine in the industry told me last week the E-P1 has built a fanbase on those who want a ‘rangefinder’ camera, but are unwilling to drop a few grand on an actual Leica rangefinder.
That said, I think E-P1 is a niche camera for street shooters and those who NEED to travel light; at least for now with its premium price tag. For the same price, one can get the ‘dual lens kit’ for the Olympus E620, which is almost the same camera feature-wise with better overall value, improved more-SLR-like ergonomics, a flip-out and rotate LCD and faster performance, but minus the ‘cool’ factor and movie mode of the E-P1. So you need to know what you’re doing before swiping the plastic for the Olympus E-P1.
What's hot:
- Good image quality with low noise, high levels of sharpness and detail
- Relatively compact, retro body design
- Small, retractable kit lens of decent quality
- Remarkably good build camera and ergonomics; uses SD/SDHC cards
- Dual command dials (main dial + scroll wheel) a rarity among digital SLRs of its class
- Full manual controls; RAW image mode, various bracketing modes and white balance tuning
- Intelligent Auto and plenty of scene modes for beginners; fun features like Art Filters and Multiple Exposure
- Snappy operation speeds
- 720p HD movie mode records at 30 FPS with stereo sound; aperture control
- RAW to JPEG processing and numerous JPEG editing features in playback
What's not:
- Autofocus slower than nearest competitor (Panasonic GH1) and entry-level digital SLRs
- No optical viewfinder
- Low resolution LCD
- No built-in flash or focus assist light
- Mediocre focusing in low-light, especially with small aperture lenses
- No real image stabilization and noisy AF when recording movies; cannot snap a still while filming
- No settings to tweak Art Filters; increased processing times/lower screen frame rate when using them
- RAW to JPEG playback tool is needlessly complex when trying to configure output settings
Recommended Accessories:
- 4 GB or larger high-speed SDHC memory card